This article details the process in Amazon Elastic Container Service to set up email notifications for stopped tasks.
Amazon Elastic Container Service (ECS)
Amazon Elastic Container Service (ECS) is a fully managed container orchestration service provided by AWS. It enables you to easily run and scale containerized applications in the cloud. ECS simplifies the deployment, management, and scaling of containers by abstracting away the underlying infrastructure.
An ECS task represents a logical unit of work and defines how containers are run within the service. A task can consist of one or more containers that are tightly coupled and need to be scheduled and managed together.
Amazon Simple Notification Service (SNS)
Amazon Simple Notification Service is a fully managed messaging service provided by AWS that enables you to send messages or notifications to various distributed recipients or subscribers. SNS simplifies the process of sending messages to a large number of subscribers, such as end users, applications, or other distributed systems, by handling the message distribution and delivery aspects.
Amazon EventBridge
Amazon EventBridge is a fully managed event bus service provided by AWS. It enables you to create and manage event-driven architectures by integrating and routing events from various sources to different target services. EventBridge acts as a central hub for event routing and allows decoupled and scalable communication between different components of your applications.
Get Started
This demo assumes you have a running ECS cluster.
1. Configure a SNS Topic.
- In the AWS console, navigate to Simple Notification Service
- Select create topic
- For type, choose standard
- Name: (choose name. e.g. TaskStoppedAlert)
- Leave the other settings at default, scroll down, and click create topic
2. Subscribe to the SNS topic you created.
- Select create subscription.
- Leave the topic ARN as default
- For protocol, select email
- For endpoint, enter a valid email address
- Click create subscription
3. Confirm the subscription.
- Open up the email that you entered, search for the AWS notifications email and click on the confirm subscription link provided in the email
- Verify that the subscription is confirmed

4. Create an Amazon EventBridge rule to trigger the SNS Topic when the state changes to stopped on an ECS Task
- Navigate to Amazon EventBridge in the AWS console
- Click create rule
- Name your rule (e.g. ecs-task-stop)
- For rule type, select rule with an event pattern
- For event source, choose AWS events or EventBridge partner events
- For creation method, choose custom pattern (JSON editor)
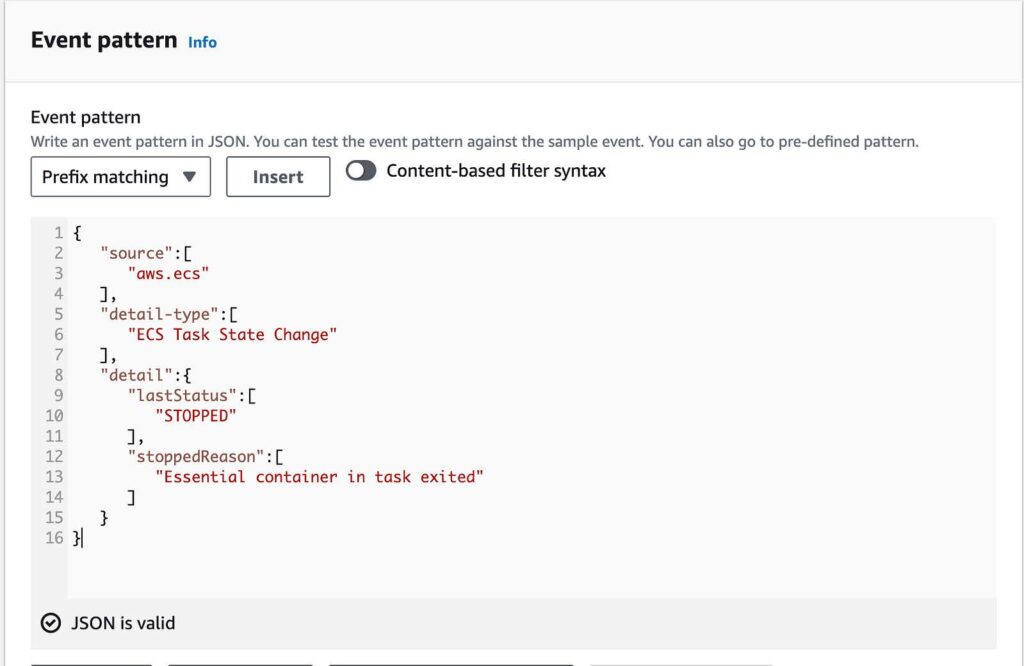
- Paste in the following code in the event pattern
{
  “source”:[
     “aws.ecs”
 ],
 “detail-type”:[
    “ECS Task State Change”
 ],
 “detail”:{
    “lastStatus”:[
       “STOPPED”
 ],
 “stoppedReason”:[
    “Essential container in task exited”
 ]
  }
}
Below is an example of the code

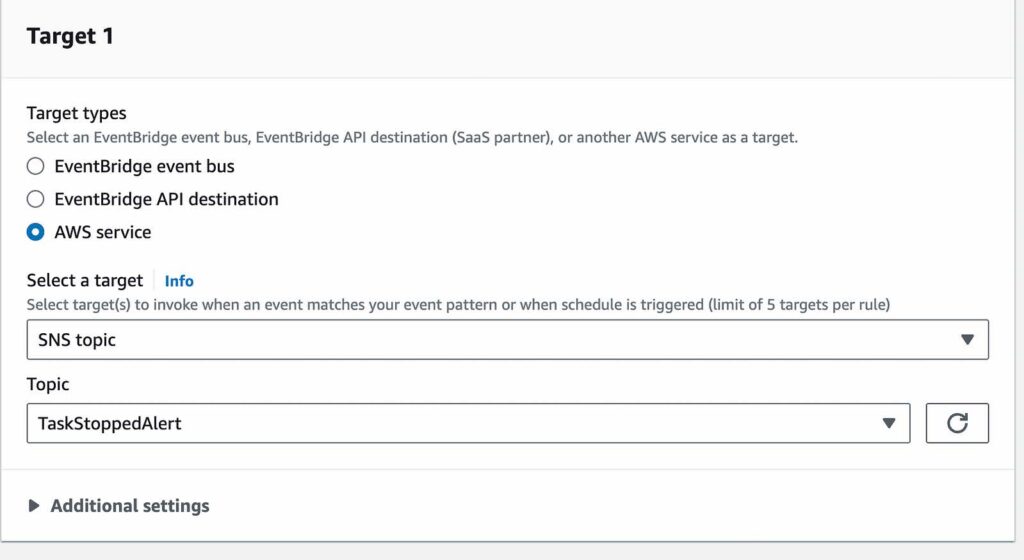
- For target types, select AWS service
- For target, select SNS Topic
- For topic, select the topic you created

- Leave the rest default and select create rule
5. Add permissions that enable EventBridge to publish SNS topics.
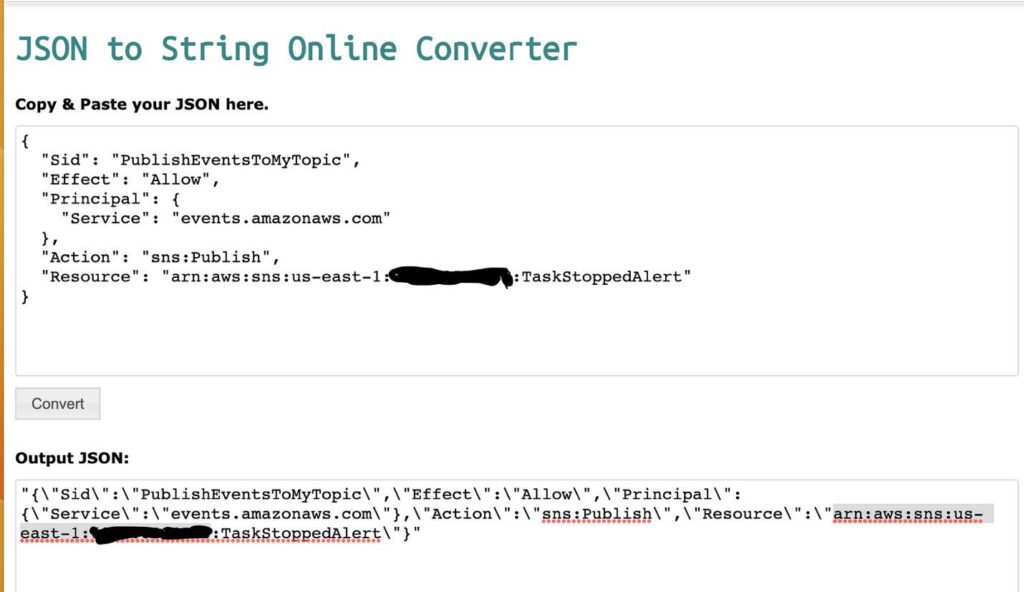
- Use a JSON converter to convert the following into a string. Click here for the link to a JSON converter.
{
 “Sid”: “PublishEventsToMyTopic”,
 “Effect”: “Allow”,
 “Principal”: {
 “Service”: “events.amazonaws.com”
 },
 “Action”: “sns:Publish”,
 “Resource”: “arn:aws:sns:region:account-id:topic-name”
}
Below, is an example provided on how to use the JSON converter with the above code.

- Add the string you created in the previous step to the “statement” collection inside the “policy” attribute
- Use the aws sns set-topic-attributes command to set the new policy.
aws sns set-topic-attributes — topic-arn “arn:aws:sns:region:account-id:topic-name” \
 — attribute-name Policy \
 — attribute-value
Below is an example of how I used the AWS SNSset-topic-attribute command to set the new policy. This also contains the string I created using the JSON converter that adds the permissions.

- Verify the permissions were added with the
aws sns get-topic-attributes --topic-arncommand

6. Test your rule
Verify that the rule is working by running a task that exits shortly after it starts.
- Navigate to ECS in the AWS Console
- Choose task definitions
- Select create new task definition
- Select create a new task definition with JSON
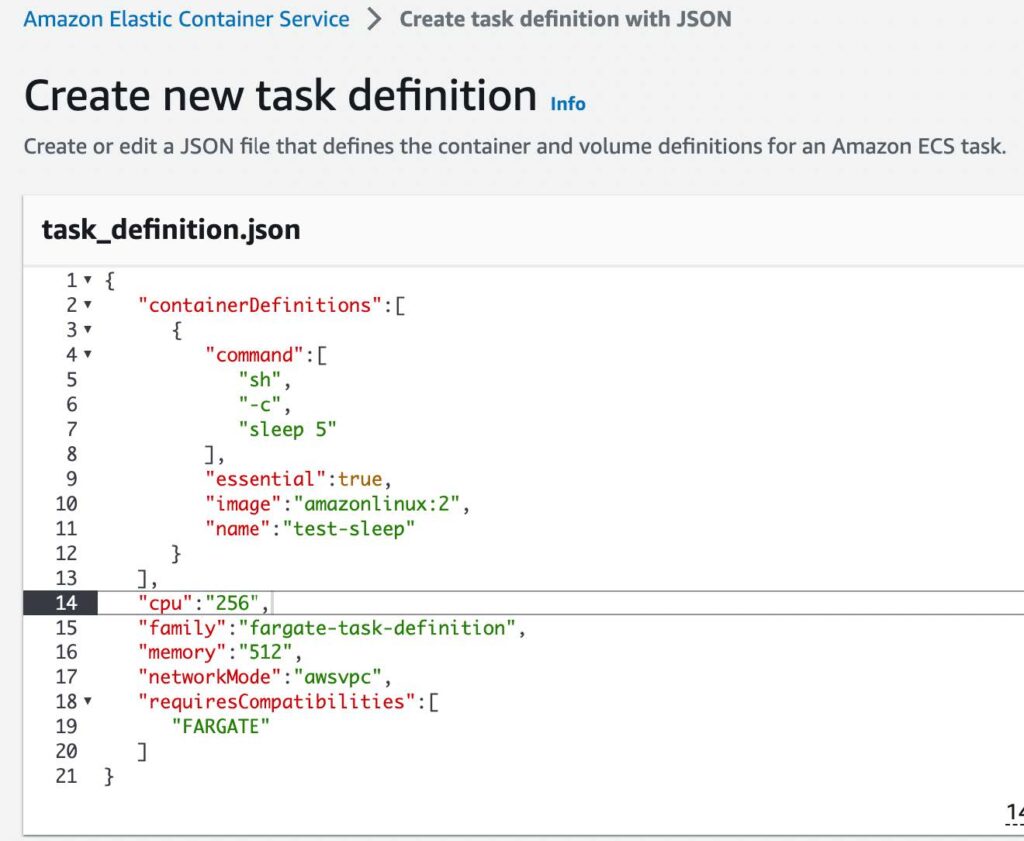
- In the JSON editor box, edit your JSON file, enter the following code into the editor
{
   "containerDefinitions":[
      {
         "command":[
            "sh",
            "-c",
            "sleep 5"
         ],
         "essential":true,
         "image":"amazonlinux:2",
         "name":"test-sleep"
      }
   ],
   "cpu":"256",
   "family":"fargate-task-definition",
   "memory":"512",
   "networkMode":"awsvpc",
   "requiresCompatibilities":[
      "FARGATE"
   ]
}
Below is an example of how the code looks in the JSON editor

- Select create
7. Run the task.
- Navigate to ECS, select the cluster you want to run the test task in.
- Select Task, and choose run new task
- For Application type, choose Task
- For Task definition > Family > Choose fargate-task-definition
- Select the number of tasks you want to run. I chose one since this is a test task
- Select Create
8. Monitor the task.
If your event rule is configured correctly, you will receive an email message within a few minutes with the event text.

Junior DevOps Engineer
Matt Mendez is a dedicated and passionate IT professional with a strong desire to help people as a consultant. With expertise in AWS, Linux, Terraform, and Google Cloud. He has acquired valuable certifications in these areas. Having hands-on experience in working with leading cloud platforms such as AWS, Azure, and Google Cloud, as well as proficient in managing infrastructure using Terraform and Kubernetes.
Follow Matt on LinkedIn

